Showing posts with label dipping. Show all posts

Sandra's Herb Dipping Oil/Sauce (for Homemade Bread)

A delicious appetizer for your guests
 pre-dinner with warm bread right out of the oven for dipping,
along with a nice glass of wine...
Yield: 1 cup
Prep: 5 Mins.
Let Stand: 2 Hrs.

Serve with:
Sandra's No-Knead Rosemary-Agave Bread(in a Cast Iron Skillet)
Click here for recipe!!
INGREDIENTS

1/2 cup Mazola oil
1 teaspoon granulated garlic
1/2 TB dried parsley
1/2 teaspoon dried thyme
1/2 teaspoon dried oregano
1/2 teaspoon freshly ground black pepper
1/2 teaspoon dried rosemary
1/4 teaspoon kosher salt
1/4 teaspoon red pepper flakes
1/4 teaspoon freshly squeezed lemon juice
1 TB grated Parmesan cheese

METHOD

Place all ingredients into a 1/2-pint Mason glass mason jar, cover with lid and ring. Shake vigorously, then set aside for a minimum of 2 hours at room temperature for flavors to meld.

Shake before serving with your favorite, warm homemade bread. ~ Enjoy!

SANDRA'S HOMEMADE SWEET THAI CHILI SAUCE

A delightful sweet chili sauce I created today in under 20 minutes,
and at the rate we go through this decadent condiment ~
it's bound to be quite the '$$ saver' as well...
Yield: 1 cup

Prep: 5 Mins.
Cook: Appx. 15 minutes

INGREDIENTS

1/2 cup white vinegar
1/2 cup + 2 tablespoons granulated sugar
1/4 cup water
3 tablespoons fish sauce
2 tablespoons quality white wine
3 teaspoons garlic granules (or powder)
1/2 to 1 tablespoon dried red chili flakes (1/2 TB mild, or 3/4 TB spicy, or 1 TB hot)
--1-1/2 tablespoons cornstarch dissolved in 4 tablespoons cool water
--2 drops red all-natural organic food coloring

METHOD

Place all ingredients (except cornstarch-water slurry mixture, and food coloring) in a small, heavy-bottom saucepan. Bring to a rolling boil. Reduce heat to medium and let boil for 10 minutes to reduced sauce by half. (The vinegar odor will be quite pungent as it burns off.)

In a small bowl, combine 4 TB water with 1-1/2 TB cornstarch to form a slurry.

Reduce heat to low and add cornstarch-water slurry mixture, and the red food coloring. Stir to incorporate, then continue stirring until the sauce thickens, about 2 minutes.

Remove saucepan from heat and carefully taste-test (I do so by spooning some sauce on a plate to let cool slightly). You should first taste sweet, followed by sour, then spicy and salty hints. If sauce isn't sweet enough, add a little more sugar. If not spicy enough, add more chili flakes.

Pour finished sauce into a 1/2-pint Mason jar, cover, and store in refrigerator (will last up to 6 months).  Serve as a condiment, dip, or marinade. ~ Enjoy!

SANDRA'S LIGHT ASIAN DIPPING SAUCE with WILD ALASKA PAN SEARED SCALLOPS

A terrific Light Asian Dipping Sauce I created while in Yakutat, Alaska
preparing a family dinner when I had minimal on-hand ingredients,
served as a first course with Pan Seared Wild Alaska Bay Scallops ~ Delish!


Serves: 4
Prep: 10 Mins.
Indoor Grill: 4 Mins.

INGREDIENTS

Light Asian Dipping Sauce:
1 tablespoon low-sodium Tamari (soy sauce)
1 tablespoon apple cider vinegar
1 teaspoon honey, more/less to your desired sweetness
2 tablespoons water
1/2 teaspoon ground ginger
Dash of garlic powder
Dash of onion powder
Dash of freshly ground black pepper
1 tablespoon minced fresh cilantro (measured after mincing)

Scallops:
2-1/2 lbs Wild Alaska Bay Scallops

METHOD

Whisk all dipping sauce ingredients in a small glass (non-reactive) bowl. Let flavors meld at room temperature for 10 minutes.

Meanwhile, rinse and pat scallops dry. Place on paper towel-lined baking dish. (Can be stored covered with plastic wrap in refrigerator for a few hours as such, although bring to room temperature for 20 minutes prior to searing.) Lightly pat tops of scallops one final time with paper towel prior to searing.

Preheat a dry cast iron grill-ribbed skillet over medium-high heat. Pan sear bay scallops for 1-2 minutes per side, depending upon size. (Larger scallops will take slightly longer to sear.) Do not overcook scallops or they'll become tough.

Place seared scallops on serving platter in a single layer with dipping sauce in a small, decorative bowl at the center, along with small dipping forks. ~ Enjoy!

~~~~~~~~~~~~~~~~~~~~~

Tips: Pan sear scallops in batches so as not to overcrowd pan, preventing steaming scallops. Also, if using larger sea scallops, cut them into quarters prior to searing.


SANDRA’S ASIAN PORK DUMPLINGS with GINGER SOY DIPPING SAUCE

These delicate dumplings
are fun to prepare,
aromatically pleasing and just
an overall exceptionally satisfying appetizer...
I decided to create a recipe for Asian dumplings because of the pork I had on-hand that needed to be prepared.  I’m so pleased that these dumplings turned out to be quite extraordinary...

Yields: (40)
Prep: 30 Mins.
Boil: 5 Mins.

INGREDIENTS

Dipping Sauce:
-(Yields: Appx. 1/2 Cup)
3 tablespoons water
2 tablespoons low-sodium soy sauce
2 tablespoons seasoned rice wine vinegar
1/8 teaspoon ground ginger
½ teaspoon sesame oil
1 teaspoon honey
1 garlic clove, minced
1/8 teaspoon red pepper flakes

Pork Dumplings:
4 uncooked boneless pork chops, cubed
½ cup shredded green cabbage
1 tablespoon chopped cilantro
2 green onions, chopped
1 garlic clove, minced
1/8 teaspoon ground ginger
1/8 teaspoon freshly ground pepper
1 tablespoon seasoned rice vinegar
1 tablespoon low-sodium soy sauce
1 package (40) ‘round’ wonton wrappers

METHOD

Whisk dipping sauce ingredients in a small glass or ceramic bowl, and set aside for flavors to meld.

Ginger Soy Dipping Sauce Recipe
For the dumplings, combine pork, cabbage, cilantro, green onions, garlic, ginger, pepper, seasoned rice vinegar, and soy sauce in the food processor.


Pulse dumpling mixture, until finely chopped and combined.


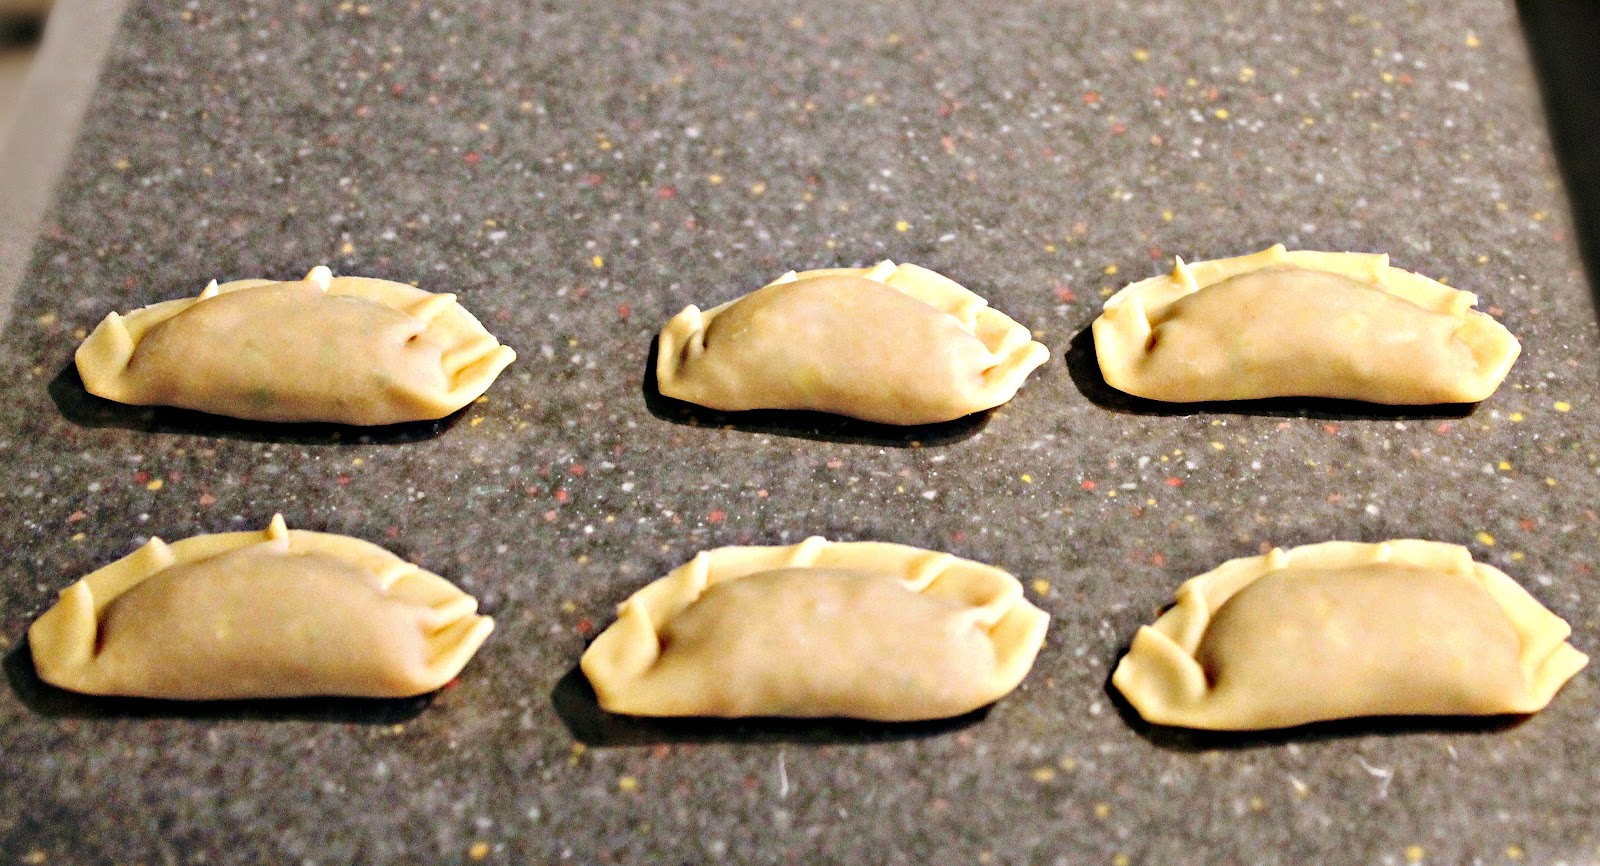
Create an assembling work space (as shown in the next photograph).  Place 1 teaspoon of filling in the center of each wrapper. Moisten the edges with water.


Fold the wrappers in half, then use your index finger and thumb to pinch the edges together to seal.


Gather the pinched edges together to form ruffles. Transfer dumplings to a sheet of wax paper and repeat process until all dumplings are formed.


Bring a large pot of water to a boil. Gently lower 8 dumplings at a time into water using a slotted spoon and cook for about 5 minutes, or until they float to the surface.


Carefully remove dumplings using the slotted spoon to a wire rack placed over a foil-lined baking sheet to drain, while ensuring they are not touching each other to prevent sticking together.


Serve immediately with the dipping sauce. ~ Enjoy!

~~~~~~~~~~

Tips:

--You can easily freeze the dumplings after they are formed (prior to cooking) by placing them, not touching, in a single layer on a parchment-lined baking sheet.  Freeze for several hours, and place in a labeled freezer ziploc bag.  After freezing, you boil them frozen using the same method until they float.

--You can also quickly make dumpling soup by simply cooking them in chicken or vegetable broth, then serve garnished with freshly sliced green onions.

SANDRA’S ASIAN GINGER SOY DIPPING SAUCE

A full-flavored dipping sauce
that is a 'go-to' favorite
of ours...
A vibrant and tasty Asian dipping sauce that will greatly accompany any dumpling, pot sticker, pan-seared scallops or shrimp recipe.

Yields: Appx. 1/2 Cup
Prep: 5 Mins.

INGREDIENTS

3 tablespoons water
2 tablespoons low-sodium soy sauce
2 tablespoons seasoned rice wine vinegar
1/8 teaspoon ground ginger
½ teaspoon sesame oil
1 teaspoon honey
1 garlic clove, minced
1/8 teaspoon red pepper flakes

METHOD

Whisk dipping sauce ingredients in a small glass or ceramic bowl, and serve with your favorite dumplings, pot stickers, pan-seared scallops or shrimp. ~ Enjoy!

I highly recommend serving this sauce with the following:

Sandra's Asian Pork Dumplings Recipe


SANDRA’S UNIVERSAL HONEY-DIJON DIPPING SAUCE, DRESSING, SPREAD, or MARINADE

This is a terrific spread
to use in place of traditional mayonnaise,
including all sorts of 
other imaginative applications...

Yields: 1/2 Cup
Prep: 3 Mins.

INGREDIENTS

4 tablespoons creamy dijon
4 tablespoons honey
1 teaspoon sesame seeds, toasted
1/4 teaspoon freshly grated ginger

METHOD

Toast the sesame seeds in a dry skillet over medium-low heat, just until slightly golden and fragrant.

Whisk together dijon, honey, toasted sesame seeds, and freshly grated ginger, then use to finish your creations by applying it to an assortment of meats or seafood. ~ Enjoy!

Here's a recipe using this honey-dijon as a condiment, which you might like:
~~~~~~~~~~
Tip: This honey-dijon pairs impeccably well with pork, turkey, ham, venison, beef, moose, buffalo, salmon, or seafood.


MAX’S MARVELOUS HALIBUT N’ CHIPS with a DIPPING SAUCE

Max’s ‘go-to’ amazing
recipe he prepares in 30 minutes -
it’s nothing short of incredible...
Servings (4)
Prep: 10 Mins.
Cook: 3 to 5 Mins. (Crinkle Fries: 26 to 28 Mins.)

INGREDIENTS

Chips:
1 (10 oz. pkg.) prepared Ore Ida Extra Crispy Seasoned Crinkle Fries

Sauce:
½ cup mayonnaise
½ cup ketchup

Halibut:
2 lbs. skinless and boneless halibut fillets cut into 3 to 4 oz. pieces
1 teaspoon old bay seasoning
½ teaspoon kosher salt
2 large eggs
1 tablespoon milk
½ of a (10 oz. pkg.) Seasoned Fry Mix for Seafood
Vegetable oil for frying

--1 lemon, cut into 8 wedges

METHOD

Preheat oven to 425, and prepare crinkle chips according to directions by baking for 26 to 28 minutes.

Meanwhile, add 1/2” vegetable oil to a large heavy-bottomed skillet, and heat to 350 degrees. 

Prepare the sauce by whisking the mayonnaise and ketchup in a small bowl, and set aside.

Evenly dust all sides of the halibut pieces with old bay seasoning and kosher salt.  In a small bowl, whisk the eggs and milk.  Add fry mix to a large Ziploc bag. Dredge halibut pieces in egg mixture, and then add and shake them in the fry mix in the Ziploc bag to coat. Place battered halibut pieces to skillet, avoid overcrowding, and fry for about 3 to 5 minutes while flipping half way through, just until golden brown (please do not overcook).  Remove and drain halibut pieces on a plate lined with paper towels.

Serve halibut pieces with a serving of chips, along with a couple of lemon wedges for squeezing over top of fish.  Place the sauce for dipping alongside in small ramekins. ~ Enjoy!


SANDRA’S KNOCKWURST, POTATO N’ CABBAGE DINNER with a MUSTARD DIPPING SAUCE

I used my brother in law Larry’s homemade ‘Venison Hot Smoky Knockwurst’ 
that absolutely made this an utmost-terrific dinner...

Flattering: Found on 3.15.14 my recipe featured at:
http://allyummyrecipes.com/15-cabbage-dishes/


Servings: (6)
Prep: 10 Mins.
Steam: 20 Mins.

INGREDIENTS

Knockwurst, Potato N’ Cabbage:
1.5 lb. ring of knockwurst, sliced into ½” thick slices
4 medium russet potatoes, peeled and cut into 1” cubes
½ head green cabbage, cut into 1-1/2” cubes
½ red onion, cut into ¾” cubes
2 tablespoons red wine vinegar
1-3/4 cups hot water

Mustard Dipping Sauce:
1 tablespoon grainy dijon mustard
2 teaspoons French’s mustard
3 tablespoons mayonnaise

--Serve dinner with prepared warm crusty bread slices rubbed with a fresh garlic clove

METHOD

In a 4-qt. heavy-bottom pot, layer half the potatoes, cabbage, onions, and knockwurst, and then repeat.  Drizzle pot contents with the red wine vinegar, and hot water. 


Cover pot, and place over high heat, and let steam for 20 minutes.

Meanwhile, prepare the grainy mustard sauce by whisking all the ingredients in a small bowl.


Drain liquid from the pot, and serve the steamed knockwurst, potato and cabbage with the mustard dipping sauce alongside, including prepared warm crusty bread slices if you so choose. ~ Enjoy!

~~~~~~~~~~~~

Tip:  Feel free to substitute less spicy smoky kielbasa or bratwurst in this recipe, or red or Yukon potatoes as well.  It is important to maintain the cut-sizes of the pot ingredients so all are steamed to perfection when done.

SANDRA’S ASIAN SWEET N’ SOUR DIPPING SAUCE

A great Sweet N’ Sour dipping sauce
for potstickers, egg rolls,
and many other Asian appetizers,
including seafood
such as scallops and shrimp...
Yields: (Appx. ½ cup)
Cook: 5 Mins.

INGREDIENTS

1/3 cup rice vinegar
4 tablespoons brown sugar
1 tablespoon ketchup
2 teaspoons low-sodium soy sauce
1 tablespoon crushed pineapple
2 teaspoons cornstarch mixed with 4 teaspoons water

METHOD

Whisk the rice vinegar, brown sugar, ketchup, soy sauce, and pineapple together and bring to a boil in a small pot over medium heat. Whisk together the cornstarch and water, add to the other ingredients in pot, and stir to thicken. ~ Enjoy!

SANDRA’S HALIBUT TAQUITOS with a CILANTRO LIME DIPPING SAUCE

A very refreshing and easy method in which
to enjoy halibut by incorporating a
bit of southwestern flair...


How nice, my recipe and photo was featured on:
http://www.eatsalaska.com/page/13
Yields: (20 Taquitos)
Prep: 20 Mins.
Bake: 15 Mins.

INGREDIENTS

Filling:
4 oz. cream cheese, at room temperature
1/3 cup prepared green salsa
1 tablespoon fresh lime juice
1/2 teaspoon ground cumin
1 teaspoon ground chili powder
1/2 teaspoon granulated onion
1/4 teaspoon granulated garlic
1 tablespoon chopped fresh cilantro
2 tablespoons sliced green onions
2 cups cooked halibut, roughly shredded
1 cup grated mozzarella cheese
½ teaspoon red pepper flakes

20 (6”) yellow corn tortillas
Olive oil for brushing tortillas (prevents them from cracking)

Garnish:
1/2 tablespoon freshly chopped cilantro

METHOD

Prepare the dipping sauce (below) several hours ahead of time to allow it to thicken, covered, in refrigerator.

Heat oven to 350 degrees. Line a baking sheet with foil, and place a baking rack over top and lightly coat with cooking spray, then set aside. 

Halibut filling prepared...
Add all the filling ingredients to a medium bowl, except halibut, and mix well to combine.  Gently fold in halibut so as not to break apart.

Ready to roll up...
Brush the tortillas on both sides with olive oil, cover with a damp paper towel, and microwave on high for 20 seconds to soften (I do so in 2 batches of 10 tortillas).  Work with a few warm tortillas at a time (while keeping others covered so they don’t dry out) by placing 2 tablespoons of halibut mixture on the lower third of a tortilla, keeping it about ½” from each edge.  Gently roll up the tortilla fairly tightly and place seam side down on prepared baking rack, then repeat.  Lay all taquitos on baking sheet while ensuring they are not touching each other (again, I bake in 2 batches of 10 rolled tortillas at a time).


Ready for the oven...

Bake for 15 minutes, or until crisp and the ends start to turn a light golden brown.  Garnish warm taquitos with freshly chopped cilantro, and serve with dipping sauce. ~ Enjoy!


Serve with:
Sandra's Cilantro
Lime Dipping Sauce

SANDRA’S CILANTRO LIME DIPPING SAUCE or SALAD DRESSING

I created this to dip my
Crispy Halibut Taquitos in,
and found it is wonderful
as a salad dressing,
and for dipping vegetables as well...
Yields: (2-1/4 cups)
Prep: 5 Mins.

1 (1 oz. pkg.) Hidden Valley Ranch Dressing Mix
1 cup mayonnaise
1/2 cup sour cream
1/2 cup milk
1/2 tablespoon fresh lime juice
1/2 tablespoon chopped fresh cilantro
1/4 cup green salsa
Sriracha (hot sauce), to taste

Whisk all ingredients in a small bowl, and add Sriracha sauce, to taste.  Place, covered, in refrigerator to thicken and for flavors to meld for 2 hours.  Use as a dip with your favorite appetizers and vegetables, or as a dressing for salads. ~ Enjoy!

Serve this dipping sauce with:
Sandra's Crispy Halibut Taquitos

SANDRA'S ROASTED SWEET POTATO FRIES with SPICY N' SWEET MUSTARD DIPPING SAUCE

I finally created Sweet Potato Fries 
with a Dipping Sauce 
that's simply addicting ~
(Use small appetizer forks 

for dipping)...
Serves: (2 to 4)
Prep: 5 min. |
Roast: 35 min

Posted by Sandra

INGREDIENTS

***Sweet Potato Fries:
2 large sweet potatoes, washed (cooking time will lessen if you use medium or small)
2 tablespoons peanut oil
1 tablespoon dark brown sugar
1/4 teaspoon cayenne pepper
1/2 teaspoon ground cinnamon
pinch of ground cloves
kosher salt and ground pepper, to taste

***Dipping Sauce: (Yields about 1 cup)
3/4 cup mayonnaise
1 teaspoon dijon mustard
2 teaspoons lemon juice
1 teaspoon sweet paprika
2 tablespoons honey
kosher salt and ground pepper, to taste

METHOD

Combine with a whisk in a small bowl all of the Dipping Sauce ingredients, and then place in refrigerator for flavors to meld, while you begin making the Sweet Potato Fries.

In a large pot, par-boil the whole, unpeeled sweet potatoes by covering them with cold salted water. Bring them to a boil over medium-high heat. Once boiling point is reached, lower the heat so you have a gentle boiling point, and cook for about 20 to 25 minutes - testing with a paring knife just until there is little a little resistance (be careful not to overcook them).

Meanwhile, while sweet potatoes are cooking, preheat oven broiler. Also, prepare a baking sheet lined with foil, and then spray it with oil, and set aside.

Once sweet potatoes are par-boiled to the right stage, transfer them to a large bowl of cold water to stop their cooking process. Once the sweet potatoes have cooled, drain them well, and peel with a paring knife, and then cut them lengthwise in half, and then into 6 wedges per sweet potato. Place the potatoes into a large ziploc bag, and drizzle them with olive oil and the remaining ingredients, and toss to evenly coat. Put the wedges on prepared baking sheet, and broil for about 3 to 4 minutes per side until they are caramelized, turning half way through. Serve them immediately with a side of  Dipping Sauce. ~ Enjoy!

SANDRA'S SWEET CHILI DIPPING APPETIZER SAUCE

A wonderful accompaniment of savory and sweet
ingredients that compliments many appetizer options...
Yields: (1/2 cup)

INGREDIENTS

2 tablespoons rice wine vinegar
2 tablespoons light olive oil
2 tablespoons hot tap water
2 tablespoons honey (for recipe, click here: Sandra's Alaska Fireweed Homemade Honey)
1/2 of a fresh lime, juiced
1/2 teaspoon 'hot' chili garlic sauce, such as sunluck (Found in the Asian isle of the market)

METHOD

In a small non-reactive bowl (glass or ceramic), whisk all the dipping sauce ingredients together, and serve with your favorite wonton wrappers, pot stickers, pan-seared scallops or other seafood, bite-sized appetizers, and so on. - Enjoy!

SANDRA'S HAWAIIAN SPAM MUSUBI

Even those with the most delicate palettes
will devour this 

epic Hawaiian Spam Musubi...
Yields: (4 Sushi Rolls = 16 total pieces)
Prep: 5 Mins. |
Cook 8 to 10 Mins.

INGREDIENTS

***Hawaiian Spam Musubi
1 (7 oz. can = half size) of Spam
3 cups uncooked sushi rice (click here for recipe at:  Sandra's Easy Sushi Rice)
1 tablespoons low-sodium soy sauce

***Glaze
1 tablespoon sugar
1 tablespoon rice vinegar
2 regular-sized nori sheets, cut in half lengthwise

--*1 bottle of furikake (usually found on the Asian isle in the market, or at an Asian store)
--*musubi-maker (see tip below)

--Scissors and sharp knife

***Sauce
1/4 cup mayonnaise
1 teaspoon lemon juice
1 teaspoon furikake (see tip below)

METHOD

Prepare sushi rice about 1.5 hours before you will need it, as it needs time to cool down completely and absorb the sushi sauce before you roll it into your Spam Musubi. Also, make the Dipping Sauce by mixing the ingredients in a small bowl, and place in refrigerator to let flavors to meld.

Assembly-line process...
Meanwhile, start an assembly line on work surface to form Spam Musubi by slicing the Spam into 4 even pieces, and set aside. Using scissors, cut 2 nori sheets lengthwise in half, and stack them, and then set aside. Open your furikake seasoning, and set aside. Place room temp water in a small bowl, and set aside.

Mix soy sauce, sugar, and rice vinegar in small bowl, including a plate to place the cooked spam on, and set both of these aside by stove.

Begin assembling in this method...
Heat a large nonstick skillet to medium heat. Place the slices of spam in the skillet, and sear undisturbed, while only turning once, until they are crispy golden brown. Pour the soy sauce mixture over the spam in the skillet and quickly saute, just until the sauce evaporates and caramelizes, and then transfer the spam slices to a plate.

Nearly finished assembling...
To assemble, lay a damp paper towel folded in half down on work surface, and lay a half of a nori sheet (non-shine side up) over it, and then place the musubi-maker with the inside moistened with water (without the lid) crosswise over the middle of the nori sheet.

Use a small spoon to place cold sushi rice into the moistened mold, filling about 1/2 full with sushi rice. Use the musubi-maker handle (with the bottom moistened) to firmly press down on rice.

Spread with a layer of sauce.

Sprinkle with a thin layer of furikake; lay a slice of spam atop, and then sprinkle another thin layer of furikake, and another layer of pressed rice until it is level with the top of the mold--pressing firmly with the moistened musubi-maker handle one final time. Hold the handle down with one hand and use the other to pull the mold upward to unmold the Span Musubi.

Fold one half of nori flap on top, moisten other edge of flap, then quickly, while tightly wrapping the nori around the rice to form a tight square shape; press gently to adhere.

Repeat 3 more times, forming 4 total square sushi logs.

With a sharp knife, cut each roll crosswise in half, then in half again to form 4 equal squares. Plate and serve with remaining sauce on the side for dipping. ~ Enjoy!

Finished assembling,
and ready to slice
(as shown in main top photo above)...
~~~~~~~~~~~~~~~~~~

Tips: 

To store leftovers, tightly wrap each Spam Musubi roll individually in plastic wrap and store in refrigerator, and then to re-heat just place in microwave for a few seconds. 

Some also prefer to fry the outside of the nori rolls before serving them in slices if they have been previously refrigerated.

I purchased the small Musubi Maker and Furikake seasoning at:
http://www.amazon.com/Spam-Musubi-Sushi-Press-K5SPS/dp/B000FWOB5S/ref=pd_sim_k_1): Once on the site, they now have them in different colors, bonus!

However, some simply use the spam can for molding Spam Musubi, which is another option.

Now, there's a large Musubi Maker here: http://www.ghco.us/index.php/large-single-acrylic-press-spam-musubi-non-stick-sushi-maker.html

SANDRA'S CRISPY CRAB WONTONS with a SWEET CHILI DIPPING SAUCE

Servings: (6 to 8)

Prep: 20 Mins. |
Cook: 2 to 3 Mins.

Posted by Sandra

INGREDIENTS:

***Filling
1 tsp onion, grated
1/2 tsp cilantro, finely chopped (plus whole leaves for garnish)
1/2 tsp ginger, grated
1 clove garlic, grated
½ teaspoon old bay seasoning
1/2 tsp worcestershire
1/2 tsp sriracha (Asian hot sauce)
2 cups dungeness crabmeat
8 oz cream cheese, at room temperature
kosher salt and ground pepper to taste

***Wrappers
1 package of wonton wrappers, thawed if frozen
1 egg, beaten
peanut oil for deep frying

***Sweet Chili Dipping Sauce (Yields: 1/2 cup)
2 tablespoons rice vinegar
2 tablespoons light olive oil
2 tablespoons hot tap water
2 tablespoons honey (for recipe: Sandra's Alaska Fireweed Homemade Honey)
1/2 of a fresh lime, juiced
1/2 teaspoon 'hot' chili garlic sauce, such as Sunluck
--(found in the Asian isle of the market)

***Garnish:
--whole cilantro leaves

METHOD

Preheat peanut oil (just enough to adequately cover wonton wrappers) to 350 degrees in an electric skillet or dutch oven, and place a slotted spoon nearby. Prepare a baking sheet lined with paper towels, and set aside.

Meanwhile, mix all the filling ingredients together in a medium bowl. Using a teaspoon, place filling into wonton wrappers, brushing edges with the beaten egg, and then fold each to seal while removing excess air from inside (see photo).

Deep fat fry both sides until lightly golden brown (just a couple of minutes), and remove by placing wontons onto prepared baking sheet with the slotted spoon to drain. Be sure to gently salt wontons while hot.

In a small non-reactive bowl, whisk all the dipping sauce ingredients together, and set aside.

Serve the crab wontons with the sweet chili dipping sauce, and garnish with whole cilantro leaves. – Enjoy!

SANDRA'S ALASKA BROILED BAY SCALLOPS with an ASIAN DIPPING SAUCE

The most succulently delicious appetizer...
Servings: (4)
Prep: 5 Mins. |
Broil: 4 to 6 Mins.

Posted by Sandra

INGREDIENTS

2 lbs. alaska bay scallops (if using larger sea scallops, increase cooking time)
1 teaspoon garlic powder
1 teaspoon old bay seasoning
2 tablespoons butter, melted
1 lemon, cut into 8 wedges, divided

METHOD

Preheat oven broiler. Line a baking sheet with foil and spray with oil, and set aside.

Rinse scallops, remove any cartilage, if present, and pat them dry with paper towels. Place scallops in a medium-sized bowl and sprinkle with garlic powder, old bay seasoning, melted butter, squeeze 4 wedges worth of juice over scallops, and toss to combine.

Place scallops on the prepared baking sheet, and broil for 4 to 6 minutes (depending on size of scallops); turning once, just until they start to turn golden brown (take special care not to over cook or they will be very tough).

Meanwhile, make the dipping sauce below.

Asian Dipping Sauce


Asian Dipping Sauce
¼ cup rice vinegar
1-1/2 teaspoons low-sodium soy sauce
½ teaspoon dijon mustard
1 small garlic clove, grated
1 teaspoon fresh ginger, grated
pinch of red pepper flakes
1/3 cup olive oil


In a small bowl, whisk all the ingredients together, except the olive oil. Add olive oil in a slow and steady stream while whisking until sauce is emulsified. Can be refrigerated for up to one week.

Remove scallops from oven and serve on a nice platter, and place 4 remaining lemon wedges for squeezing along the perimeter, and the Asian Dipping Sauce in the center. ~ Enjoy!

SANDRA'S TASTY TURKEY MEATBALLS with a SPICY DIPPING SAUCE

These are super tasty and moist meatballs 
- The perfect appetizer...
Yields: (30 Meatballs)

Posted by Sandra
Prep: 10 Mins. | Cook: 10 Mins.

INGREDIENTS

***Spicy Dipping Sauce
1/2 cup mayonnaise
2 tablespoons tomato paste
2 teaspoons sriracha sauce (or your favorite hot sauce)
1/2 teaspoon red pepper flakes
1 teaspoon paprika
kosher salt and ground black pepper to taste

***Turkey Meatballs
1 pound ground turkey (or chicken)
2 cloves garlic, minced
1 egg, beaten
¼ cup sour cream
3 tablespoons italian seasoned bread crumbs
2 teaspoons worcestershire sauce
¼ teaspoon cayenne pepper
1 teaspoon onion powder
1 teaspoon Italian herb seasoning blend
1 teaspoon brown sugar
1 lemon, zested
kosher salt and freshly ground black pepper
1 tablespoon unsalted butter
1 tablespoon extra-virgin olive oil

METHOD

First, make the sauce in a small bowl by whisking together all of the ingredients until well combined, and set aside.

In a large bowl, begin making turkey meatballs by ‘gently’ mixing the ground turkey, garlic, beaten egg, sour cream, bread crumbs, worcestershire, cayenne pepper, onion powder, italian seasoning, brown sugar, lemon zest, kosher salt and a few grinds of pepper to taste in a bowl. Form into 1-1/2” meatballs, making 30 meatballs. Warm the butter and oil in a large skillet over medium heat. Transfer the meatballs to the pan and do not disturb for 3 to 5 minutes to lightly brown, (cook in batches if need be, so as not to overcrowd pan). Turn, cooking another 3 to 5 minutes on other side without disturbing. Keep cooking until browned and cooked on all sides, but still juicy and plump with a spring to the touch (do not overcook). Transfer to a paper towel-lined plate to drain.

Serve on a platter with toothpicks for dipping into spicy sauce. ~ Enjoy!

SANDRA'S HOMEMADE ROASTED RED PEPPER SAUCE

A fantastically versatile sauce
that is great with most any seafood, shellfish,
meat, or poultry entree...
Yields: (3/4 cup)
Prep: 10 mins.

Posted by Sandra

INGREDIENTS:

4 whole jarred roasted red bell peppers
1 tablespoon fresh parsley
¼ cup sour cream
¼ cup mayonnaise
1 teaspon lemon juice
1 teaspoon worcestershire sauce
1 teaspoon honey
--(For the homemade recipe click here:  Alaska Fireweed-Clover Honey)
2 teaspoons red wine vinegar
1 clove garlic, grated
1 teaspoon onion, grated
Kosher and ground pepper, to taste

METHOD

Puree the all the ingredients in the blender, taste for seasoning, and add salt and pepper as desired. - Enjoy!


~~~~~~~~~~~~~~~~~~~


Tip: Can be refrigerated up to 2 days. This sauce is wonderful with seafood, or as a dip for jalapeno poppers, chicken tenders, etc. It is also great as a sandwich spread, or a salad dressing, or toss with prepared pasta.

SANDRA'S ASIAN DRESSING or DIPPING SAUCE

A balanced Asian dipping sauce that
you'll find complimentary to seafood,
pot stickers, and so much more...
Yields: (Appx. 1 cup)

Posted by Sandra

INGREDIENTS:

¼ cup rice vinegar
1-1/2 teaspoons low-sodium soy sauce
½ teaspoon dijon mustard
1 small garlic clove, grated
1 teaspoon fresh ginger, grated
Pinch of red pepper flakes
1/3 cup olive oil

METHOD:

In a small bowl, whisk all the ingredients, except the olive oil. Add olive oil in a slow and steady stream until emulsified, and use to your heart's content. Refrigerate for up to one week.

SANDRA'S HOMEMADE CHILI SAUCE

A very good Chili Sauce staple 
to have on-hand at all times.
You'll find that I use this in
many recipes listed on this site...
Yields: (Appx. 4 cups)

Prep: 5 mins. |
Cook 30 mins.


Posted by Sandra

INGREDIENTS

2 (14.5 oz. cans) diced tomatoes, undrained
1 small spanish onion, diced
½ cup dark brown sugar
1 teaspoon kosher salt
½ teaspoon freshly ground pepper
1 tablespoon chili powder
1 teaspoon red pepper flakes
¼ teaspoon ground cinnamon
¼ teaspoon ground allspice
¼ teaspoon ground cloves
1 teaspoon cider vinegar

METHOD

Place all ingredients together in blender; pulsing just until slightly chunky. Place in a saucepan over medium-high heat and bring to boil, then reduce heat and simmer with lid tilted (letting some steam escape) for 30 minutes.

Cool and place in an airtight jar (labeled with name, date made, including expiration date). ~ Enjoy!

~~~~~~~~~~~~~~~~~~~


Tip: This chili sauce will last up to 6 months in your refrigerator to use in a host of recipes, or when making chili,  or just to heat and use as a sauce with seafood.

LinkWithin

Related Posts Plugin for WordPress, Blogger...