Showing posts with label how to. Show all posts

SANDRA'S HOMEMADE MAYONNAISE (in 5 minutes)

Making homemade mayonnaise is incredibly easy
when you use ‘key’ room temperature ingredients!

Simply follow my step-by-step instructions below...


Yield: 1 cup (1/2 pint)
Prep: 5 Mins.
Stand: 4 Hrs. at room temperature
Refrigerate: Up to 1 week
  
INGREDIENTS

1 large pasteurized egg yolk, room temperature (save egg white, see a recipe to use it below*)
½ teaspoon kosher salt
1/8 teaspoon ground white pepper
4 teaspoons white wine vinegar (unseasoned), room temperature
1 cup Mazola Oil
1/2 teaspoon freshly squeezed lemon juice, room temperature
1 Tablespoon amber agave
1/8 teaspoon dry ground mustard
1 Tablespoon boiling water

METHOD

Lay out all ingredients, according to the preparation order listed below, also ensuring egg yolk, white wine vinegar, and lemon juice are all at room temperature. Place a small saucepan of water on stove to boil.

Place the egg yolk, salt, white pepper, and vinegar into the bowl of your food processor fitted with the metal blade.

Put your oil into a 1 cup liquid measuring cup so it is easy to pour.

Remove the feed tube insert if it doesn't have a 'drizzle hole' (one of mine does, the other does not). With the processor running, slowly drizzle in the oil, starting with a few drops at a time and continuing with a very slow and steady stream. As the mayonnaise begins to thicken, continue pouring, slowly, until all of the oil has been used.

Once the mayonnaise is thick, slowly blend in the lemon juice, agave, dry mustard and boiling water, just until incorporated.

Place the mayonnaise in a covered 1/2-pint Mason jar and let stand at room temperature for 4 hours to allow the acidic chemical reaction to sufficiently take place, including preventing it from separating when refrigerated later on.

Place mayonnaise in the refrigerator and use within a week. ~ Enjoy!

~~~~~~~~~~~~~~~

Tip:
* Save egg white and use to make Sandra's Sweetly Spiced Candied Pecans shown here:


SANDRA'S ALASKA SOURDOUGH GLAZED COFFEE CAKE


There's no better way to start your day than
with a piece of this incredible sourdough coffee cake
and a nice cup of hot coffee...
Servings: (9)

Prep: 10 Mins.
Bake: 30 to 35 Mins.

INGREDIENTS

Cake
1 cup 'fed' sourdough starter  
--[Click this link for "Sandra's Homemade Sourdough Starter"]
1⁄3 cup Mazola oil
1 large egg
1 cup all-purpose flour
3⁄4 cup granulated sugar
1⁄2 teaspoon kosher salt
1 teaspoon baking soda
1/2 teaspoon double-acting baking powder (or regular)
1 teaspoon ground cinnamon

Topping
1 teaspoon ground cinnamon
1⁄2 cup dark brown sugar
1 tablespoon all-purpose flour
2 tablespoons unsalted butter, cold, cut into 1/4" cubes

Glaze
1 cup confectioners' sugar, sifted
2-1/2 tablespoons 2% milk
1/2 teaspoon bourbon vanilla extract (or regular vanilla extract)

METHOD

Preheat oven to 350F. Spray a 9" square baking dish; set aside.

In a medium bowl, whisk the egg. Add the sourdough starter and oil, whisk to combine.

In another bowl, sift through a sieve the remaining cake dry ingredients; add to sourdough mixture and switch to a spoon to combine batter.

Place batter into the prepared baking dish.

In a small bowl, add the cinnamon, brown sugar and flour topping ingredients.  Work in the cold butter using a pastry cutter until crumble-topping resembles the size of small peas. Sprinkle topping crumbles over batter in baking dish.

Bake for 30 to 35 minutes, just until a toothpick inserted in center comes out clean.

Meanwhile, prepare the glaze in a small bowl by sifting the confectioners' sugar, stir in milk and bourbon vanilla extract, and whisk to combine.  Once cake is done baking, drizzle the glaze over the top while warm.  Let the cake cool, then cut into 9 equal squares. Serve with your favorite cup of coffee. ~ Enjoy!

SANDRA'S HOMEMADE FRENCH BREAD

Its crisp-crunchy crust, perfect center and phenomenal flavor
makes this French Bread the only recipe you'll ever end up using!

That glistening crust is from the egg whites, not oil = healthier bonus...
Yields: (1 Loaf)
Prep 20 Mins.
1st Rise Dough: 30 Mins.
Rolling: 10 Mins.
2nd Rise Loaf: 40 Mins.
Bake 40 Mins.
Cool Loaf: 20 Mins.

INGREDIENTS

1 cup warm water
3 teaspoons active dry yeast
1 teaspoon granulated sugar
1 tablespoon olive oil, plus 1/2 teaspoon more for oiling bowl
2-1/2 cups all-purpose flour
1 teaspoon table salt
--1 large egg, white only

METHOD

In the bowl of a stand mixer, add warm water, yeast, and sugar. Let proof/bloom for 10 minutes.

Add 2 tablespoons olive oil, flour and salt, and use the dough hook on low speed to beat until well blended. Increase the speed to medium, the let the stand mixer knead the dough about 8 to 10 minutes total. Shape into a ball. Wipe a large bowl with 1/2 teaspoon olive oil, place dough in the bowl, and turn once to ensure dough is completely but lightly coated. Cover bowl with plastic wrap, and let dough rise in a warm place until doubled in size, about 30 minutes.


Place a silpat liner or parchment paper on a baking sheet; set aside.


Punch dough down and place onto working surface. DO NOT re-knead. Use a rolling pin to roll into a large rectangle (I DO NOT add flour, as the outer olive oil prevents sticking to the working surface and rolling pin)


Using fingers in a typewriter-fashion to roll into rectangle loaf, starting from a long side working to the opposite long end. Pinch to seal seam. Tuck tapered ends under.


Place loaf seam side down on prepared baking sheet. Lightly beat the egg white, the brush on top of loaf (reserve remainder for a second basting through mid-baking time). 


Cover loaf with a clean kitchen towel. Let rise until doubled, about 40 minutes.

About 30 minutes into last rising, preheat oven to 375 degrees.


With a very sharp knife, make 4 diagonal cuts about 1/4" deep across top of each loaf. Bake in a preheated oven for 20 minutes. 


Brush again with egg white mixture, rotate baking sheet for even baking. 

Bake for an additional 20 minutes, or until bread tests done. Remove loaf from baking sheet, and cool a minimum of 20 minutes on a wire rack covered loosely with a clean kitchen towel. 


When loaf is rested, cut into 1/2" crosswise slices using a serrated knife. ~ Enjoy!


~~~~~~~~~~~~~~~~~~~~~~~~
~~~~~~~~~~~~~~~~

Try my French Bread recipe in
Sandra's Oven-Roasted Tomato Bruschetta
[Click here for recipe...]

Sandra's Oven-Roasted Tomato Bruschetta

SANDRA'S ALASKAN RHUBARB UPSIDE-DOWN CAKE ~ from scratch

Newly created recipe
thanks to my neighbor for providing me with fresh rhubarb and my sis Tina for the inspiration.

This is guaranteed to be my best recipe to date of the most
succulent, moist and flavorful homemade rhubarb cake, ever! 


Servings: (9-12)
Prep: 15 Mins.
Bake: 25 to 30 Mins.

INGREDIENTS:

1st Layer: Rhubarb Mixture:
2-1/2 cups chopped fresh rhubarb (about 1/2" pieces; measure after chopping)
1/2 cup dark brown sugar
1 teaspoon freshly squeezed lemon juice
1/4 cup (1/2 stick) 1/2" cold unsalted butter cubed pieces

2nd Layer: Cake Batter:
--Wet:
1/2 cup (1 stick) unsalted butter (not margarine), at room temperature
1-1/2 cups granulated sugar
2 large eggs
1/2 cup mayonnaise
2 teaspoons vanilla extract
1-1/4 cups milk
--Dry:
1-1/2 cups all-purpose flour
2-1/2 teaspoons double-acting baking powder (or regular)
1-1/2 teaspoons baking soda
1/2 teaspoon salt

METHOD:

Preheat oven to 350 degrees. Spray a 9x13" glass baking dish; set aside.

Spread the rhubarb evenly over bottom of prepared baking dish. Sprinkle with brown sugar, drizzle with lemon juice, then dot with cold butter cubes.

In the bowl of a stand mixer (or hand mixer and large bowl), slowly beat sugar and softened butter for several minutes until light and creamy. Add the eggs, mayonnaise, vanilla extract and milk, then slowly beat to incorporate.

Sift dry ingredients through a sieve over wet ingredients in mixing bowl of stand mixer. Very slowly, pulse mixture to incorporate. Scrape sides of bowl and beat batter a final time.

Pour batter over rhubarb mixture in bottom of baking dish; spread batter out evenly using a spatula, then tap baking dish to level cake.

Bake for 25 to 30 minutes, until top is golden and a toothpick inserted in center comes out clean.  Let cake stand for 5 minutes on a cooling rack. Release sides with a knife before inverting onto a rectangle cake platter (or large baking sheet). Serve warm or at room temperature. ~ Enjoy!


SANDRA'S ALASKAN MOOSE ROAST - PRIME RIB STYLE

A simplistic method using minimal spices and ingredients
to guarantee utmost flavor
of our prized Alaskan moose roasts; prime rib style, that is!


Servings: (8-10)
Prep: 5 Mins.
Roast:  1 Hr. 20 Mins.

INGREDIENTS

4 lb. boneless moose roast (tied with kitchen string)
6 fresh medium garlic cloves, sliced in half
Canola oil (sufficient amount to rub entire exterior of roast prior to seasoning)
Fresh ground black pepper (we like to use a lot!)
Kosher salt (a fairly nice dusting)

METHOD

Remove roast from refrigerator 1 hour prior to roasting (tie with kitchen string if not already done). Using a sharp boning knife, poke as many small holes all over uncooked roast to insert the number of garlic clove halves; push in holes. Let prepped roast sit at room temperature for 1 hour (this is an important step to relax meat fibers).

Meanwhile, preheat oven to 450 degrees for a minimum of 15 minutes.

Rub roast with canola oil, and season exterior with freshly ground black pepper and kosher salt.

Place roast fat-side up on roast rack inside a shallow-sided roasting pan. Insert a meat thermometer into middle of roast.

Roast uncovered at 450 degrees for 20 minutes.

After 20 minutes of high-heat cooking, reduce heat to 350 degrees and continue to roast for 1 hour, or until meat thermometer registers 135 degrees for medium rare doneness (temperature will increase while standing another 5 to 7 degrees).

When 135-degree internal temperature is achieved, remove roast to a carving board. Tent loosely with parchment paper then foil (do not let foil touch roast directly) and allow roast to rest (without cutting) for at least 20 or more minutes to allow inner juices to redistribute. ~ Enjoy!

~~~~~~~~~~~~~~~~~
Tips: Start checking internal roast temperature for a 3-lb roast (subtract appx. 15 minutes), or for a 5-lb roast (add appx. 15 minutes) of roasting time during the final 350-degree cooking time.

This method of roasting wild Alaskan game works well with venison (deer), caribou, beef., et. al...


SANDRA’S ALASKA SMOKED SALMON SUSHI SQUARES

An incredible salmon sushi
that is now my all-time favorite creation
and I'm positive most all of you will enjoy...

Yields: (4 Sushi logs, cut into 16 total squares)
Prep: 15 Mins.; plus preparing sushi rice ahead of time

INGREDIENTS

Sauce:
1 tablespoon mayonnaise
1/2 teaspoon Wasabi paste

Layers:
3 cups cooked and cooled sushi rice
--(Click here for recipe:  Sandra's Easy Sushi Rice)
Furikake Seasoning, optional
--(Japanese seaweed seasoning – See tip below)
1 (1/2-pint jar) smoked salmon sockeye strips, roughly flaked
8 thin strips red bell pepper
8 thin strips peeled celery
4 thin strips peperoncini (mild Greek green pickled jarred pepper)
2 sheets of Nori, cut in half lengthwise
1 tablespoon toasted sesame seeds

--Musubi-maker (See tip below)
--Scissors and a sharp knife

For serving (optional):
--Low-sodium soy sauce
--Wasabi paste
--Sliced pickled ginger

METHOD

Prepare sushi rice about 1.5 hours before you need it, as it has to cool down completely to absorb the sauce before you roll it into sushi squares.

Sandra's Easy Sushi Rice Recipe
In a small bowl, combine the mayonnaise and 1/2 teaspoon wasabi; set aside.


Start an assembly line on work surface to form salmon sushi squares by setting salmon, bell pepper, celery and peperoncini strips aside.  Set the sauce aside. Using scissors, cut 2 nori sheets lengthwise in half and stack them (dull side up), and set aside. Open furikake seasoning and sesame seed jars, and set aside. Place room temperature water in a small ramekin, and set aside.


To assemble, lay a halved nori sheet down, and place musubi-maker with the inside moistened with water (without the lid) crosswise over the middle of the nori sheet. Use a small spoon to place cold sushi rice into the mold (about 1/3 full with sushi rice when pressed). Use the musubi-maker handle (with the bottom moistened) to firmly press down on the rice. 


Spread the rice with a thin layer of sauce, sprinkle a thin layer of furikake; layer lengthwise ¼ of smoked salmon flakes, 2 strips of red bell pepper, 2 strips of peperoncini and 2 strips of celery on atop, and sprinkle with another thin layer of furikake, then another layer of pressed rice until the mold is about ¾’s full; pressing firmly with the moistened musubi-maker handle one final time.  


Hold the handle down with one hand, and use the other to pull the mold upward; hence un-molding the salmon sushi square log. 


Tightly wrap the nori around the rice, moisten where the edges meet on top, and gently press to adhere it. Repeat 3 more times.


Using a moistened sharp knife, cut each roll crosswise into 4 equal squares (wipe knife after each cut and dip into cold water), and plate sushi squares, then sprinkle each of them with sesame seeds. Serve at room temperature with soy sauce, wasabi and/or pickled ginger if desired. ~ Enjoy!

~~~~~~~~~~~~~
Tip:  I purchased the Musubi Maker and Furikake seasoning at: http://www.amazon.com/Spam-Musubi-Sushi-Press-K5SPS/dp/B000FWOB5S/ref=pd_sim_k_1) – although most use a spam can for molding sushi squares.

SANDRA’S BELOVED CHEESY SHREDDED POTATO-BACON BAKE

This entree of potatoes, cheese,
bacon and spinach is perfect for
brunch, a potluck, game day, or a quick,
colorful and flavorful dinner
with a salad...
Servings: (12)
Prep: 20 Mins.
Bake: 1 Hr.-15 Mins.

INGREDIENTS

Sauce:
4 tablespoons unsalted butter
½ white Vidalia sweet onion, diced
½ cup celery, finely chopped
1 garlic clove, minced
1/4 cup all-purpose flour
1 cup milk
3/4 cup low-sodium chicken broth
2 teaspoons worcestershire
½ cup mayonnaise
½ cup sour cream
Salt and white pepper, to taste

Other ingredients:
1 (1 lb.-4 oz. pkg.) refrigerated shredded real hash browns (I used Simply Potatoes)
1 (10 oz. pkg.) frozen chopped spinach, thawed, drained, hand-squeezed, and chopped finer
4 strips of bacon, sliced and browned
2 cups medium shredded cheddar cheese, divided

METHOD:

Preheat oven to 375 degrees.  Spray a 9”x13” baking dish, and set aside.

In a medium skillet, melt the butter over medium heat.  Add onion and celery and cook for 5 to 7 minutes until onions are translucent. Add garlic and cook for 1 minute.  


Whisk in flour, and cook for 1 minute. Whisk in milk, chicken broth, and worcestershire, then bring to a boil; reduce heat and simmer, stirring regularly, until desired consistency is achieved, about 10 minutes. 


Remove from heat, and fold in mayonnaise and sour cream to combine.  Add salt and white pepper, to taste.


Add shredded potatoes, spinach, bacon, and 1-1/2 cups shredded cheese to a large bowl.  


Add sauce, and fold mixture to combine. 


Spread mixture in prepared baking dish, cover baking dish with foil, and bake for 1 hour. 


Remove from oven.


Sprinkle with remaining ½ cup of cheddar cheese and bake, uncovered, for an additional 15 minutes.  


Let cool 15 minutes.  Cut into 12 equal squares, and serve. ~ Enjoy!


~~~~~~~~~~~~~
Tip:  This baked potato entree can be prepared ahead of time, such as the night before and refrigerated, and then baked the following day (just bring it to room temperature for 30 minutes prior to placing in oven).

SANDRA’S SEAFOOD-OLYMPIA STUFFED JUMBO PASTA SHELLS

A delicate, creamy and exquisite
scallop-shrimp-halibut olympia pasta entree that
is bound to leave you speechless...
This recipe was inspired by my sister in law Chantil’s Halibut Olympia recipe that our family adores.

Servings: (4) Individual Gratins
Prep: 10 Mins
Bake 25 Mins.

INGREDIENTS:

20 Jumbo Pasta Shells
¼ teaspoon sea salt

Sauce:
2 cups sour cream
2 cups mayonnaise
2 cup freshly grated Parmesan cheese
1 teaspoon old bay seasoning

Filling:
½ lb. fresh bay scallops, cut into ½” chunks
½ lb. fresh shrimp, peeled and deveined, then cut in half lengthwise
½ lb. skinless, boneless fresh halibut, cut into ½” chunks
¼ yellow bell pepper, finely chopped
½ teaspoon garlic granules
½ teaspoon onion granules
¼ teaspoon white pepper
1 tablespoon Italian parsley, finely chopped
1 cup canned, French fried onions

Garnish:
½ teaspoon paprika
1 green onion (green parts only), finely sliced

METHOD:

Add water into a 6 qt. pot and bring to boil, add salt and pasta and cook for 10 minutes, just until al dente so the shells are easier to fill (as they will continue to cook in the oven).  Drain shells in a colander, then place them upside down on a foil-lined baking sheet to further drain any additional water.


Preheat oven to 350 degrees. Spray 4 individual gratin dishes, and set aside.

In a medium bowl, combine sauce ingredients.  


Spread a 2 heaping teaspoons of sauce in each gratin dish, and spread evenly over bottom of dishes. 


Add filling ingredients to a medium bowl, including folding in 1/3 of the remaining sauce until combined. Set remaining sauce aside.


Fill each of the pre-cooked pasta shells with about 1 heaping tablespoon of the seafood mixture, and place shells filling side up in gratin dishes on top of sauce; adding 5 shells per gratin dish. 


Generously top filled shells equally in gratin dishes with remaining sauce. Bake for 25 minutes, until golden brown. 


Garnish with paprika and sliced green onions; serve immediately. Enjoy!

SANDRA’S ASIAN PORK DUMPLINGS with GINGER SOY DIPPING SAUCE

These delicate dumplings
are fun to prepare,
aromatically pleasing and just
an overall exceptionally satisfying appetizer...
I decided to create a recipe for Asian dumplings because of the pork I had on-hand that needed to be prepared.  I’m so pleased that these dumplings turned out to be quite extraordinary...

Yields: (40)
Prep: 30 Mins.
Boil: 5 Mins.

INGREDIENTS

Dipping Sauce:
-(Yields: Appx. 1/2 Cup)
3 tablespoons water
2 tablespoons low-sodium soy sauce
2 tablespoons seasoned rice wine vinegar
1/8 teaspoon ground ginger
½ teaspoon sesame oil
1 teaspoon honey
1 garlic clove, minced
1/8 teaspoon red pepper flakes

Pork Dumplings:
4 uncooked boneless pork chops, cubed
½ cup shredded green cabbage
1 tablespoon chopped cilantro
2 green onions, chopped
1 garlic clove, minced
1/8 teaspoon ground ginger
1/8 teaspoon freshly ground pepper
1 tablespoon seasoned rice vinegar
1 tablespoon low-sodium soy sauce
1 package (40) ‘round’ wonton wrappers

METHOD

Whisk dipping sauce ingredients in a small glass or ceramic bowl, and set aside for flavors to meld.

Ginger Soy Dipping Sauce Recipe
For the dumplings, combine pork, cabbage, cilantro, green onions, garlic, ginger, pepper, seasoned rice vinegar, and soy sauce in the food processor.


Pulse dumpling mixture, until finely chopped and combined.


Create an assembling work space (as shown in the next photograph).  Place 1 teaspoon of filling in the center of each wrapper. Moisten the edges with water.


Fold the wrappers in half, then use your index finger and thumb to pinch the edges together to seal.


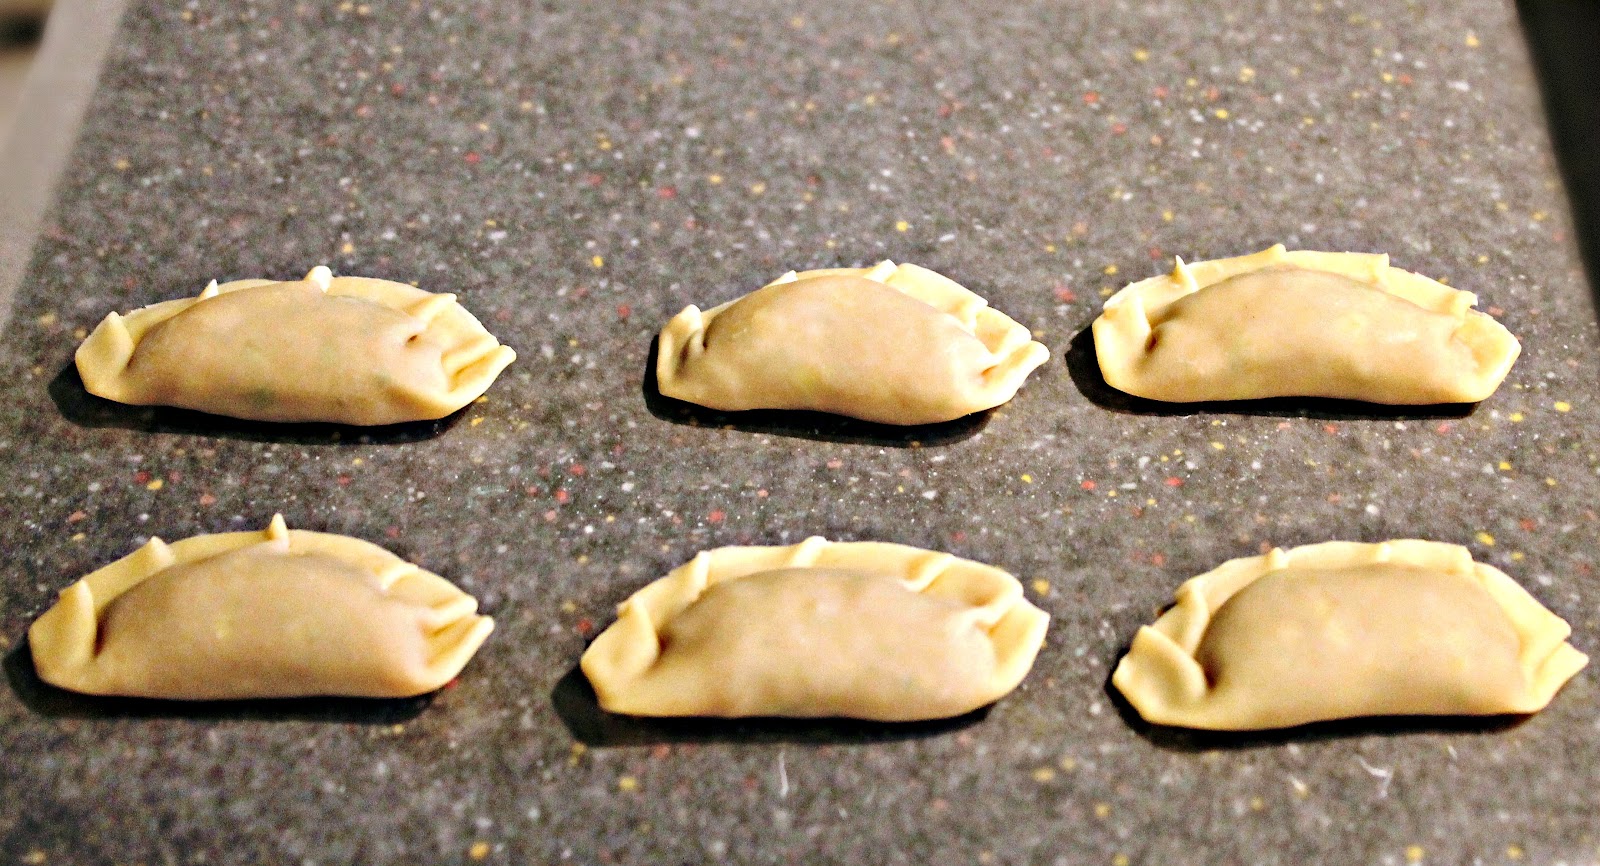
Gather the pinched edges together to form ruffles. Transfer dumplings to a sheet of wax paper and repeat process until all dumplings are formed.


Bring a large pot of water to a boil. Gently lower 8 dumplings at a time into water using a slotted spoon and cook for about 5 minutes, or until they float to the surface.


Carefully remove dumplings using the slotted spoon to a wire rack placed over a foil-lined baking sheet to drain, while ensuring they are not touching each other to prevent sticking together.


Serve immediately with the dipping sauce. ~ Enjoy!

~~~~~~~~~~

Tips:

--You can easily freeze the dumplings after they are formed (prior to cooking) by placing them, not touching, in a single layer on a parchment-lined baking sheet.  Freeze for several hours, and place in a labeled freezer ziploc bag.  After freezing, you boil them frozen using the same method until they float.

--You can also quickly make dumpling soup by simply cooking them in chicken or vegetable broth, then serve garnished with freshly sliced green onions.

LinkWithin

Related Posts Plugin for WordPress, Blogger...