Showing posts with label pic. Show all posts

Sandra's Fresh Apple Pecan Cake (9x13")

 
My husband loves this cake
so much he had two pieces 'after' eating lunch...

Ingredients
Method

SANDRA'S CINNAMON RAISIN STREUSEL MUFFINS

 
An easy recipe to prepare
with awesome results...

Prep: 15 Mins.

Bake: 30 Mins.

Yield: 12 Cupcake-Size Muffins


INGREDIENTS

 Muffin batter:

 WET:

1/3 cup vegetable oil

1 egg, beaten

2/3 cup milk

 DRY

1 1/2 cups all-purpose flour

3/4 cup white sugar

1/2 teaspoon salt

1/2 teaspoon cinnamon

2 teaspoons baking powder

1/2 teaspoon baking powder

1 cup raisins, tossed with 1 teaspoon A-P Flour (prevents them from sinking to bottom of batter)


Crumb topping:

1/2 cup white sugar

1/3 cup all-purpose flour

1/4 cup cold butter, cubed

1/2 teaspoons ground cinnamon

 METHOD

 Preheat oven to 350F. Grease cupcake-size baking pan cups, or line with muffin liners and then spray insides.

 Whisk all muffin wet ingredients in a medium bowl, add all dry ingredient on top of wet ingredients (except raisins) and combine with a wooden spoon. Fold in flour-coated raisins. Scoop batter into prepared baking pan cups with/without liners until evenly disbursed.

Mix crumb topping ingredients in a small bowl using a pastry cutter (or fork) until crumbly and the size of peas, and sprinkle evenly over muffins (using a teaspoon) before baking.

Bake for 30 minutes (turning half way) in the preheated oven, or until a toothpick inserted in center of muffin comes out clean.

Let hot muffins cool in baking pan for a minimum of 10 minutes before removing, and serving.


Sandra's Homemade French Bread (1 loaf) with Garlic Bread Options

We prefer this small crumb soft crust version,
most recipes yield two loaves, this is a single loaf recipe;
perfect for my husband and me as there are no additives
so lasts several days (not weeks with unknown ingredients)...

 Ingredients
Steps
  1. .
  2. Notes


Sandra’s Easy Apple Butter (No refined sugars or pectin)

Wonderful shelf-stable (no refrigeration needed until its opened) condiment,
a taste like no other that's excellent on toast,
bagels, English muffins, ice cream, etc...
Prep: 20 Mins.
Cook: 1 Hr.
Water Bath: 10 Mins.
Stand/Set: 24 Hrs.
Yield: 4 cups (or Four 1/2-pint jars)

Ingredients
Method
  1. .
  2. .
Notes


SANDRA'S ONE POT VENISON GOULASH


Prep: 10 Mins.
Cook: 40 Mins.
Rest: 5-10 Mins.
Servings: 8-10

Ingredients
Method


SANDRA'S CANDIED PECANS


Ingredients
Method

SANDRA'S MILE HIGH LEMON CHIFFON PIE

 
A truly decadent dessert
your family and friends are bound to love...

Prep: 1 Hr.

Yield: 8-10 Servings: (1) 9" Pie

Bake: 10 Mins. (Crust)


INGREDIENTS

Crust

1-1/4 cups all purpose flour

1 stick unsalted butter, cold and cut into pieces

1/4 teaspoon salt

1/4 cup ice water (more or less, depending on your humidity)


Filling

1 1/2 cups granulated sugar

1/3 cup cornstarch

1 1/2 cups cold water

2 egg yolks, beaten

1/4 cup lemon juice

Pinch of kosher salt

--1 (14-oz. can) Sweetened Condensed Milk (reserve for assembling pie later on)


Whipped Cream/Topping, divided

1-3/4 cup heavy whipping cream

1/3 cup sifted confectioners' sugar

1 teaspoon vanilla extract


METHOD

Crust

Add flour to a food processor, and then add the butter pieces.  Pulse a few times until the mixture resembles small peas.  Add the salt and a couple of teaspoons of water through the tube at a time while pulsing until the mixture forms chunky-type balls.  Remove from food processor and place onto a lightly dusted flour surface, and form into ball, and then press flat.  Cover with plastic wrap and chill at least 4 hrs. or overnight.  Remove from refrigerator, and dough let return to room temperature for 30 minutes before rolling out crust(s).


Preheat oven to 425F.


Line the pie plate, and flute the edges of crust, and then carefully pierce bottom and sides with a fork.  Gently place tin foil over inside of crust, and place beans (or pie ball weights) over foil to weight bottom of crust down while baking.  Bake for 10 to 12 minutes.  Remove from oven and let cool completely before adding cream filling. (Note: You can save the beans in a sealed jar for the same use again, but not for cooking.)


Filling

In a ‘cold’ small saucepan, mix together water and cornstarch.

When the cornstarch dissolves, add sugar, lemon juice, slightly beaten egg yolks, and kosher salt.

Cook over medium heat stirring constantly until it thickens and comes to a boil.

Remove the thicken lemon mixture from the heat (or cook longer if you’d like it thicker).

Let the filling cool completely before using (but first cover top of filling with plastic wrap to prevent a skin  from forming).


Whipped Cream/Topping, divided: (2/3 for incorporating into filling / 1/3 for topping)

Place the mixing bowl and whisk attachment in the freezer for 5 to 10 minutes to chill. Pour the heavy whipping cream into the chilled bowl and use an electric mixer to beat the heavy cream on medium-high speed until soft peaks start to form. Slowly add the powdered sugar in batches and continue beating on high speed until stiff peaks form. Add the vanilla extract and whip to incorporate. Set aside.


Assemble the Pie


In a large mixing bowl, combine lemon pie filling and sweetened condensed milk and stir until they are well combined. Add 2/3rds of the prepared whipped cream (reserving 1/3 for topping); fold together until well combined. Pour the filling into the prepared crust leaving a high mound in center, top with reserved 1/3 of whipped cream, and refrigerate for a minimum of 4 hours until the filling is set. ~ Enjoy!


SANDRA'S EASY APPLE HAND PIES


So easy and delicious,
and these freeze beautifully
allowing you to bake them whenever you get a craving for them...


Yield: 8 Hand Pies
Prep: 20 Mins.
Bake: 15 Mins.
 
INGREDIENTS
 
FILLING:
1 TB salted butter
1 TB all-purpose flour
1 TB packed brown sugar
1/2 cup water
1/2 tsp vanilla extract
1/2 teaspoon lemon juice
1 tsp apple pie spice blend
1 large honeycrisp apple, peeled, cored and finely diced
 
1 can refrigerated grand biscuit dough
 
—3 TB melted butter
—Cinnamon-sugar
 
METHOD
 
Heat oven to 350F. Line a baking sheet with parchment paper; set aside. In small bowl, combine sugar and cinnamon; set aside. Melt 3 TB butter; set aside with a pastry brush.
In a cold, small heavy-bottom saucepan, place all the filling ingredients into pan. Place over medium heat and constantly stir until apples are tender and sauce thickens, about 10 minutes. Set aside to cool. (I like to make the filling ahead of time so I don’t have to wait for it to cool when I’m ready to bake these hand pies.)
 
Meanwhile, separate dough into 8 pieces; roll each into 5” rounds.
 
Place 2 tablespoons of filling slightly off center on each round. Fold dough over filling; press edges with fork to seal. Brush each with melted butter; sprinkle with cinnamon-sugar mixture. Cut a small slit atop each hand pie.
 
Bake for 15 minutes or until golden brown, turning baking sheet halfway through baking. Immediately remove hand pies from baking sheet to a cooling rack. Cool 5 minutes before serving; serve warm. ~ Enjoy!
 
TIP:
To freeze, place un-baked hand pies on a baking sheet in a single layer and flash-freeze for 3 hours. Place in a ziploc freezer bag, removing as much air as possible, then label and date.
 
Cook frozen hand pies in a preheated 350F oven for 25 minutes or until golden brown.


SANDRA'S HOMEMADE MILD SWEET ITALIAN MOOSE SAUSAGE

It's imperative to let the flavors meld for a minimum of 12 hours
prior to cooking
this wonderful moose sausage...

Yield: Four 2-1/2 lb. portions (total of 2 lbs.)
Prep: 20 Mins.
Cook Patties: 3-4 Mins per side (7-8 Mins total)
Meld Flavors: 12 hours

 
INGREDIENTS
 
2 pounds lean ground moose (venison or other meats and poultry work well too)
1 tablespoon red wine vinegar
1 teaspoon dried parsley
1 teaspoon garlic powder
1 teaspoon onion powder
1 teaspoon dried basil
1 teaspoon kosher salt
1/2 teaspoon fine-ground black pepper
1/2 teaspoon paprika
1/2 teaspoon crushed red pepper flakes
1/4 teaspoon ground fennel seed
--(crush whole seeds in a mortar and pestle or spice grinder)
¼ teaspoon brown sugar
⅛ teaspoon dried oregano
⅛ teaspoon dried thyme
 
METHOD
 
Place ground moose and red wine vinegar in the bowl of a food processor, sprinkle with parsley, garlic powder, onion powder, basil, salt, black pepper, paprika, red pepper flakes, fennel seed, brown sugar, oregano, and thyme. Gently pulse until flecks of spice are evenly distributed throughout meat (scraping down sides as needed).
 
Form mixture into four 3-inch squares (1/2 lb. ea.), double-wrap each in plastic wrap, label, and date. Refrigerate for at least 12 hours before cooking, or freeze* directly.
 
To cook thawed sausage, heat a large skillet over medium heat. Form mixture into 3" patties that are 1/2" thick.  Working in batches, cook sausage patties in the hot skillet until no longer pink in the center, about 3-4 minutes per side. An instant-read thermometer inserted into the center should read 160F.
 
TIP:
*You can freeze the sausage if desired - when ready to use, pull out of freezer and thaw in refrigerator overnight then continue to prepare as stated above.

Here is the frozen version
(made yesterday and froze overnight)


SANDRA'S SOURDOUGH-AGAVE HOAGIE ROLLS


Soft and perfect sourdough-agave hoagie rolls, my 3 favorite ways I use them are:
- Italian Subs
- Italian Meatball Subs
- Moose/Venison French Dips

Yield: 10 Hoagie Rolls

Bake: 20 Minutes

INGREDIENTS:

Sponge:
1/4 cup pre-fed sour dough starter (stir beforehand)
1 cup AP (All-Purpose) Flour
1 cup warm water

Mix together all the sponge ingredients in a large glass measure, cover with plastic wrap, and let sit a minimum of 12 hours before making rolls.

Sponge you'll prepare 12 hours
prior to making sour dough bread
and will leave at room temperature

Replenish Starter (replenish, cover and let sit out for 12 hrs, then return to frig):
1 cup warm water
1 cup AP flour

Using a wooden spoon and a glass measuring cup, mix together replenish starter ingredients and pour into jar with sour dough starter. Cover and let stand at room temperature 12 hours before refrigerating.

Don't forget to replenish your
starter after removing
a portion for your sponge

~~~~
Sandra's Sour Dough Starter
recipe
Dough:
2-1/4 teaspoons regular yeast
1/2 cup warm water
1 tablespoon agave
2-1/3 cups all-purpose (AP) flour; plus
1/2 cup whole wheat flour (or the same AP)
2 teaspoons kosher salt
4 tablespoons 'cold' butter, cut into small cubes

1 tablespoon melted butter, for brushing rolls halfway through baking

METHOD

For the dough, in a stand mixer bowl fitted with a dough hook, dissolve yeast and 1/2 cup warm water, add agave, stir with a spoon and allow to proof for 5-10 minutes.

Stir in sponge, add AP flour (and whole wheat flour, if using), and kosher salt. Turn mixer on #2 to combine, increase speed to #3 and continue mixing until dough comes away from sides of bowl to form ball (adding additional water 1 TB at a time if needed, depending upon surrounding humidity environment). Continue to knead on #3 for 4 minutes.

While mixer is running, add the cold butter a few cubes at a time and give mixer time to incorporate, then repeat process until all the butter has been added (do not rush this step).  Let the dough continue to knead for 3 additional minutes.

Place dough on oiled plastic wrap. Clean mixing bowl, then lightly spray with canola oil, place dough ball back into bowl and turn over to coat in oil all around. Cover with plastic wrap. Nest bowl on kitchen towels, both underneath and around it.  Let dough rise until doubled for approximately 1 hour.

Prepare a rimmed baking sheet (1/2-sheet pan size) by lining it with parchment paper; set aside.

Turn dough out onto a lightly oiled surface; knead into a flat disc, cut into 8 equal balls. Shape each ball into 6" long rolls. Place rolls onto the prepared baking sheet, cover with a plastic wrap and allow to rise until doubled, about 30-40 minutes.

Meanwhile, allow oven to preheat to 375 degrees at end of dough rising time. Set aside an instant read thermometer.

Cut light lengthwise slashes atop of each roll. Bake for 10 minutes, removed par-baked rolls and brush with melted butter, then return to oven and continue baking 10 minutes longer, or until internal temperature reads 192 degrees.

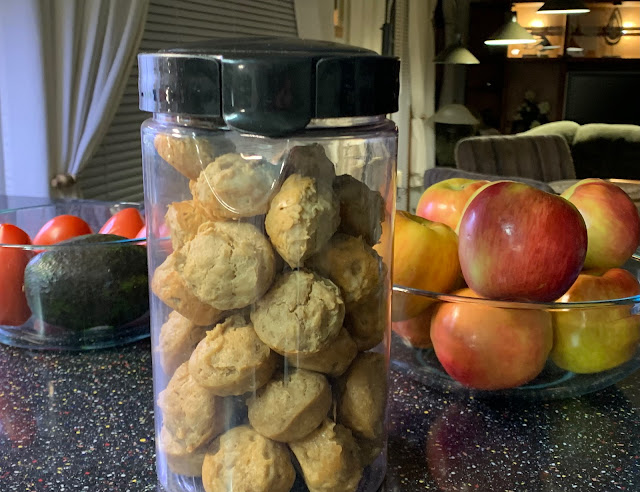
Remove rolls from oven and place them right-side-up onto a cooling rack. Cover rolls completely with clean kitchen towels and let cool for a minimum of 2 hours before storing in a plastic bag.

Store at room temperature for 2 days, then refrigerate to store longer. If you freeze the rolls, be sure to double wrap each roll individually in plastic wrap, then place them in a Ziploc bag that you'll need to label and date. ~ Enjoy!

SANDRA'S ONE-BOWL APPLE CAKE in ONE-HOUR

This the most amazing and flavorful cake; simply incredible...

Yield: 12 Servings
Prep: 20 Minutes
Bake: 55-60 Minutes
 
INGREDIENTS

2 large eggs
1-13/4 cups granulated sugar
1/2 cup canola oil
1 teaspoon vanilla extract
1 teaspoon lemon juice
1/2 teaspoon kosher salt
4 large honey crisp apples (or 6 medium), peeled, cored, and diced)
2 cups all-purpose flour
2 teaspoons apple pie spice
2 teaspoons baking soda
1 teaspoon baking powder
 
Garnish:
Confectioners' sugar
 
METHOD
 
Preheat oven to 350F. Spray a glass 9x13" baking dish; set aside.
 
In a large bowl, whisk together the eggs, sugar, oil, vanilla extract and lemon juice.  Switch to a large spatula and fold in the diced apples; mixing to combine. Place all remaining ingredients into a sieve and sift over wet ingredients in bowl; fold to combine.
 
Pour mixture into the prepared baking dish, and bake for 55 to 60 minutes, until a toothpick inserted in center comes out clean.
 
Move cake from oven to a cooling rack, cover with paper towels to let cool, then serve garnished with a generous dusting of confectioners' sugar. ~ Enjoy!
 
~~~~~~~~~~~~
 Tips:

1) Store remaining cake that has been cooled, covered in plastic wrap, in the glass baking dish, and
2) If you bake the cake in another ceramic, metal, aluminum, etc. baking dish that is not glass, your baking times will vary (that is, will take either longer or a shorter time to bake). 


SANDRA'S MINI KEY LIME PIES


Yields: 5 Mini Pies [5 (8-oz./1-cup size) Ramekins]
Prep: 15 Mins.
Bake Crust: 8 Mins.
Bake Filled Pies: 8 Mins.

INGREDIENTS

Crust:
1/2 cup graham cracker crumbs
1 tablespoon granulated sugar
1-1/2 tablespoons salted butter melted

Filling:
1 (14 oz. can) sweetened condensed milk
1/4 cup sour cream
1/3 cup key lime juice (or lime juice)
1 key lime zested (or a regular lime zested)
1 large egg yolk, beaten

Whipping cream:
1 cup heavy whipping cream
2 teaspoons vanilla extract
4 tablespoons confectioners' sugar

METHOD

Preheat oven to 350F. Place 5 ramekins on a baking sheet; set aside. Place a medium glass bowl in the refrigerator to chill for whipped cream preparation.

For the crust, place the butter and sugar in a small glass bowl and microwave on high for 30 seconds. Add the graham cracker crumbs and mix to combine. Spoon the crust mixture equally amongst the 5 ramekins and press to form crust-like bottoms.  Bake in preheated oven for 8 minutes.

Meanwhile, prepare the filling by zesting the lime (divide in half, as you'll use 1/2 for the filling and the other 1/2 for garnishing the pies).  In a 4-cup glass measure, add the lime juice, sweetened condensed milk, sour cream, beaten egg yolk, and 1/2 the lime zest; whisk to combine until smooth.

Once the crust are baked, pour the filling equally on top of the crusts in the 5 ramekins; bake for 8 minutes. Remove from oven to a baking rack and let mini pies cool for 30 minutes.

Once cooled, place in refrigerator, uncovered, for 3 hours to fully set and for flavors to meld.


Meanwhile, prepare the whipped cream in the prepared chilled bowl and whip until peaks form, add the vanilla extract and confectioners' sugar; whip to incorporate until it reaches the stiff-peak stage. Place, covered, in the refrigerator until pies are ready to serve (along with the remaining lime zest for garnish).

After 3 hours, remove the pies, top with whipped cream, sprinkle each pie equally with the remaining lime zest. ~ Enjoy!

___________

Tip: If you are not going to serve all of them after the 3-hour refrigeration time, please cover any remaining pies with plastic wrap and feel free to store up to 5 days.


SANDRA'S UPSIDE-DOWN PEACH CAKE (from scratch)


My husband says,
"This is my favorite upside-down cake, don't change a thing"...

Servings: (9-12)

Prep: 20 Mins.

Bake: 35 to 37 Mins.


INGREDIENTS


1 cup all-purpose flour

1 cup granulated sugar

1/2 teaspoon kosher salt

2 teaspoons baking powder

1 teaspoon baking soda

1 teaspoon ground cinnamon

1/4 teaspoon ground ginger

2 teaspoons vanilla extract

3 large eggs, beaten

⅓ cup peach nectar (I prefer Kerns)

1 stick salted butter, melted

¾ cup light brown sugar, packed

1 (24-oz. jar) peach slices (Kirkland brand from Costco)

--Homemade whipped cream for serving

DIRECTIONS

Preheat oven to 350 degrees. Set aside an 8x8x2" square, dark baking pan.

For the cake batter: In a large bowl, whisk together flour, sugar, salt, baking powder, baking soda, cinnamon and ginger.  Add the vanilla extract, beaten eggs and peach nectar; mix until well blended, and set aside.

Meanwhile, melt the butter in the microwave, covered, in a glass bowl for about 1 minute and 20 seconds.  While hot, whisk in the brown sugar for 1 minute, pour the mixture into the bottom of the baking pan.

Line peach slices in a nice pattern on top of the butter-sugar. Pour cake batter on top of the peach slices, gently so as not to disturb the sliced peach layer.

Bake cake for 35 to 37 minutes (turning half way for even baking) or until a toothpick inserted into center comes out clean.

Cool cake for 10 minutes then invert the cake onto a serving plate and serve with homemade whipped cream!


SANDRA’S HEALTHY PAISLEY MINI MUFFIN PB TREATS


A healthier treat you know that's good for your pup and
it's ongoingly freshly made; Paisley loves 'em...


Yields: 19 Mini Muffin Treats (I make 2 batches at a time, yielding 38 treats…aka 1 qt.)

Prep: 10 Mins.

Bake: 16 Mins. (Turning ½ way for even baking)

 Cool: On baking rack covered with a clean kitchen towel overnight

INGREDIENTS


2 large eggs, beaten

½ cup Skippy peanut butter (no artificial sweetener like ‘xylitol’ – ck label plz)

¾ All-purpose flour

½ cup old fashioned oats (not quick cooking)

½ cup water


METHOD


Preheat oven to 350F. Place a non-stick mini muffin baking pan aside (if not non-stick, spray w/canola spray). Also, place a baking rack for removing mini muffin treats to after baking for cooling.


To a medium bowl, add the eggs and whisk until fluffy; add peanut butter and continue whisking until thicker and emulsified. (Switch to a spatula at this point).


Add the A-P Flour, oats, and water; stirring just to combine.


Using a 1-TB-size mini scoop, drop mounds into the mini muffin tin cups (should yield 19).


Bake in preheated oven for 16 minutes total; turning half way for even baking.


Remove from oven. Use a teaspoon promptly remove mini muffins to the baking rack in order to cool completely (on baking rack covered with a clean kitchen towel overnight) before storing treats in an airtight container to safely store up to 2 weeks.


Tip: I make a double batch, which stores in a 1-qt.-airtight-container perfectly for up to 2 weeks in an airtight container.


LinkWithin

Related Posts Plugin for WordPress, Blogger...